

If you are looking to maximize your trading efficiency and capital potential in the fast-paced crypto derivatives market, mastering leverage is a mandatory step. This comprehensive Bitget Futures Trading Guide is carefully crafted to assist both beginner and intermediate market participants in navigating the platform safely in 2026. Bitget has solidified its position as a world-class exchange, trusted by millions of global users for its robust security architecture, high liquidity, and remarkably low transaction slippage.
In this step-by-step Bitget Futures Trading Guide, we will thoroughly explain how the derivatives interface operates, how to utilize leverage settings intelligently, and how to execute your very first long or short position without committing costly beginner mistakes.
🎁 Exclusive Incentive: Want to start trading with an edge? Register your account through our official [Bitget Registration Link] right now to instantly unlock premium welcome bonuses up to $6,200 and secure an exclusive trading fee discount!
The Core Choice: Cross Margin vs. Isolated Margin
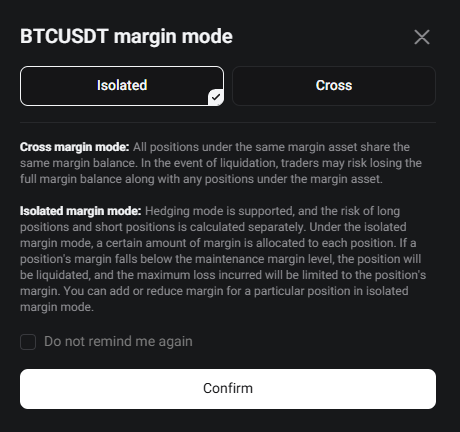
Before you risk a single dollar on the live order book, this Bitget Futures Trading Guide stresses the absolute necessity of understanding how different margin modes protect or expose your trading capital.
1. Cross Margin Mode
In Cross Margin mode, the system utilizes the entire available USDT balance within your futures wallet to prevent a position from being liquidated. While this provides more breathing room for your trade to fluctuate, a severe market crash against your direction can completely wipe out your entire account balance.
2. Isolated Margin Mode
In Isolated Margin mode, the maximum risk is strictly confined to the precise amount of capital allocated specifically to that individual trade. If the market triggers your liquidation price, you only lose the margin assigned to that single position, leaving the rest of your account untouched. For anyone reading this guide, we strongly recommend using Isolated Margin exclusively to start.
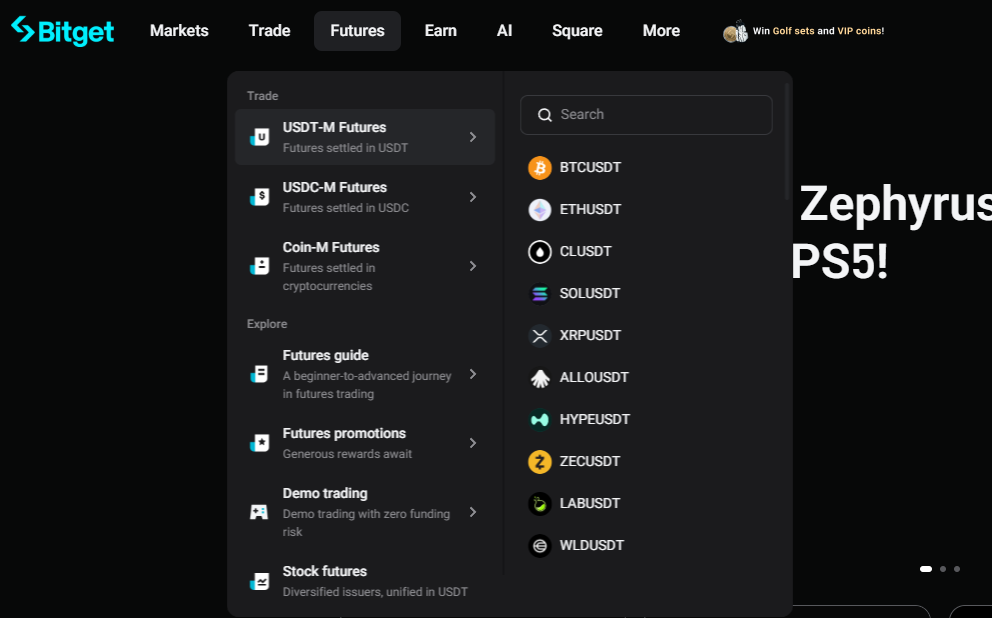
Step 1: Transferring Funds to Your Bitget Futures Wallet
To begin executing live trades, you must position your assets into the correct sub-wallet on the platform.
- Account Access: Log in to the exchange using our verified [Bitget Registration Link] to ensure all active fee discounts are successfully applied.
- Asset Transfer: Locate your master wallet and transfer your USDT stablecoins from the “Spot Account” over to the “USDT-M Futures Account”.
- Enter Trading UI: From the top primary navigation header, hover over [Trade] and select [USDT-M Futures], then choose your desired trading pair, such as BTCUSDT.
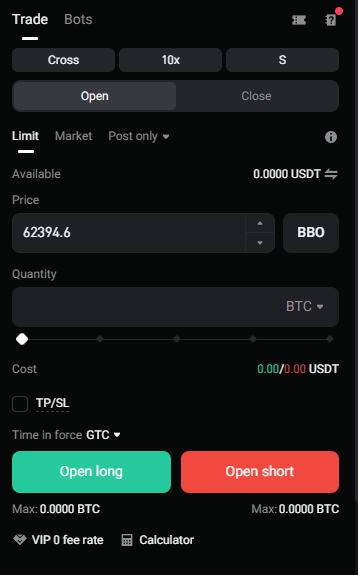
Step 2: Selecting Leverage and Placing Your First Order
Leverage is a powerful tool that acts as a double-edged sword; it amplifies your financial gains just as quickly as it multiplies your losses.
Essential Execution Settings:
- Set Leverage Size: Modify your leverage multiplier via the control panel on the right side of the screen. We explicitly advise beginners to maintain a conservative leverage ratio between 2x and 5x during their initial learning phase.
- Limit Orders: Enter a specific, precise target price where you want your contract to execute. Utilizing limit orders allows you to act as a maker, saving you substantial amounts on transaction fees over time.
- Market Orders: This execution type triggers immediately at the absolute best available current market price. Use this only during high-volatility scenarios where you must enter or exit a trade instantly.
Step 3: Mastering Long and Short Market Positions
One of the greatest competitive advantages highlighted throughout this Bitget Futures Trading Guide is the unique ability to generate profits regardless of whether the broader crypto market is moving up or down.
- Buy / Long Contract: Open a Long position if your technical analysis suggests the cryptocurrency price is poised to rise.
- Sell / Short Contract: Open a Short position if your analysis indicates the cryptocurrency price is preparing to drop.
⚠️ Inviolable Risk Control Rule: Never, under any circumstance, authorize a live position without configuring your Take Profit (TP) and Stop Loss (SL) parameters. Setting these levels automates your exit plan and guarantees you will not face catastrophic losses while you are away from your screen or sleeping.
Understanding Bitget Funding Fees

In addition to standard maker and taker transaction costs, futures traders must account for Funding Fees. These are small payments exchanged between long and short traders every 8 hours to ensure the futures contract price stays closely pegged to the actual spot market price.
- Positive Funding Rate: Long position holders pay short position holders.
- Negative Funding Rate: Short position holders pay long position holders.
- Always glance at the funding countdown timer on the Bitget interface before holding large leveraged positions across the settlement hours.
Conclusion: Protect Your Capital First
Developing consistent profitability in the crypto derivatives arena requires immense psychological discipline and patient risk calibration. As we conclude this Bitget Futures Trading Guide, remember that capital preservation is always the number one metric of a truly professional trader.
To maximize your net trading revenue, you must also minimize your operational transaction costs. Be sure to read our ultimate guide on [How to Reduce Bitget Trading Fees] to learn how to claim exclusive partner discounts and slash your transaction costs by up to 50%!
1 thought on “Bitget Futures Trading Guide 2026: How to Trade Safely”